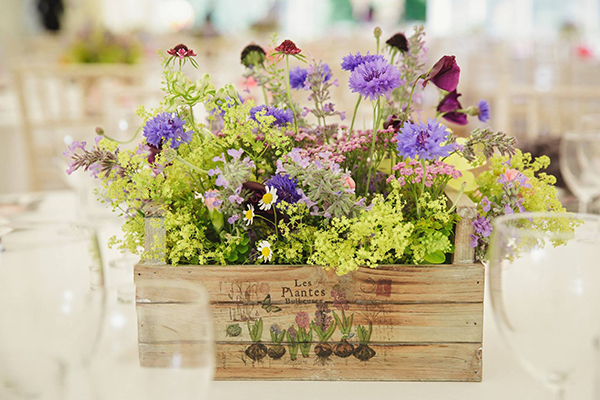
Last week on the New Wives Club we started this two part feature on how to grow cut flowers by looking at what to grow. If you missed the part one, make sure you catch up by reading ‘how to grow your own cut flowers – what to grow’ first.
Today I have the concluding part of this lovely feature by Chloe from BareBlooms, looking at the equipment you need and a step-by-step guide on how to grow your chosen flowers. You’ll also find some top tips from Chloe at the bottom of the post, along with a glossary like we included in part one. So without further ado I hand you over to Chloe…
Equipment
There is a lot of choice out there (seed trays, modules, pots etc) but as a lover of thrift I’m going to concentrate on the budget options. I like to sow larger seeds into Jiffy 7s – these are little dehydrated compost pellets – and the advantage of these is that you don’t need to buy bags of seed compost, which is handy if you’re short of space. For those who are environmentally-minded you can get peat-free ones made from coir.
Most importantly, using Jiffys mean you avoid root disturbance when potting on or out, and there’s no delicate ‘pricking out’ to be done. You can buy special trays to put these compost pellets in, but they are usually not suitable for placing on a windowsill and can be expensive. Let’s face it, the vast majority of us don’t have a greenhouse but we do have a window ledge.
I prefer to recycle old fruit and vegetable packaging, specifically the little plastic trays that things like raspberries come in. The beauty of these is they even have their own clear lid, so voilà! you can have a ready-made and free propagator.
How to grow
Step 1. Get your Jiffy 7s ready along with a bowl of water.

Step 2. Place the Jiffys in the bowl of water to soak for between 10 and 30 minutes – it should be obvious when they are fully hydrated.
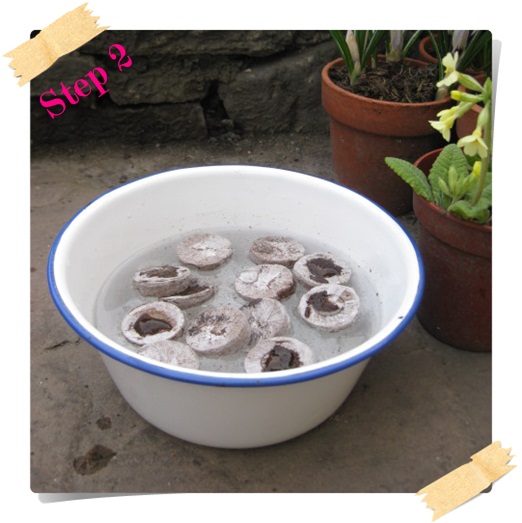
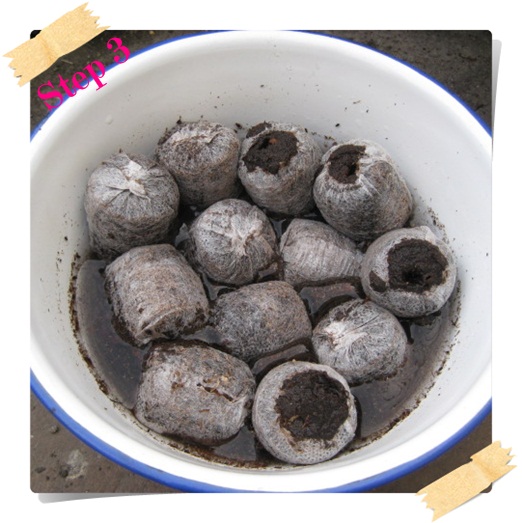
Step 3. This is what your Jiffys will look like once they’ve been soaking.
Step 4. Place you hydrated Jiffys in your recycled fruit packaging tray.
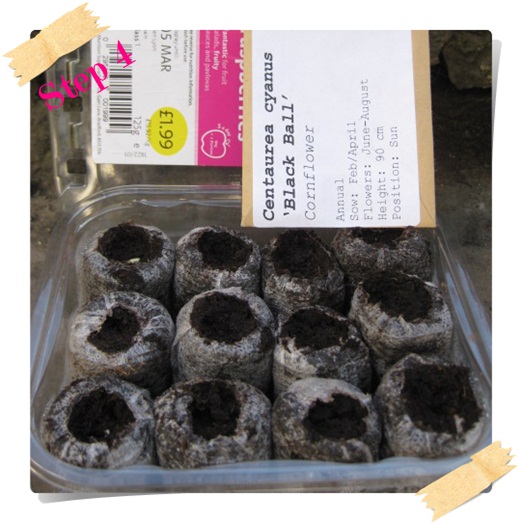
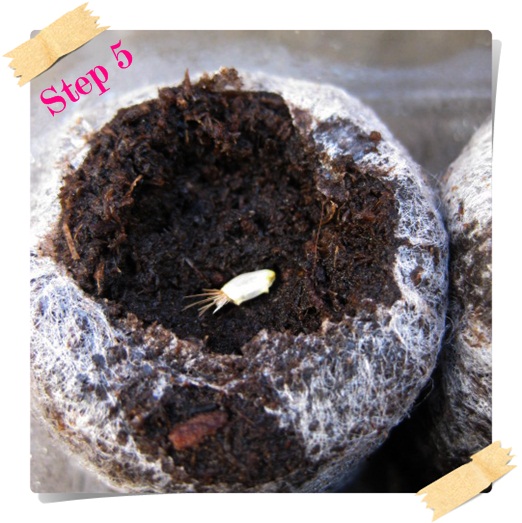
Step 5. Place 1 or 2 seeds in the middle of each Jiffy – if both seeds germinate, you can carefully pull out and dispose of the weaker seedling. Push the seed down with your finger or the end of a pencil and squeeze the Jiffy to make sure the seed is covered.
Step 6. Put the lid on the packaging tray and you have your homemade propagator! Place the tray on a windowsill and check daily to make sure the Jiffys have not dried out. Make sure they are always moist to the touch, adding water little and often.
The ideal windowsill is a warm sunny one – you will need to turn the tray daily once the seedlings have germinated to straighten them up as they will always lean to the light. When the seedlings begin to germinate keeping checking to make sure they aren’t touching the lid – when they get too tall remove your freebie propagator lid.

Step 7. These Cornflower seedlings are ready to be potted on.

Step 8. Potting on with the Jiffys is easy as you can just place the whole thing in a small pot of multipurpose (peat free) compost. If you’re pricking your seedling out of seed compost, use a pencil to lever the seedling out and only hold the seedling by its seed leaves, never the stem. Once you have finished your baby Cornflower plants will be all snug in their own little pot.

Step 9. This crate of new Cornflower plants are ready to be hardened off before planting in the garden. To harden off your plants (assuming you don’t have a greenhouse or cold frame), simply place your baby plants outside during the day and remember to bring them in at night.

Step 10. Once they have been hardened off you can plant them in your garden and before you know it you’ll have a row of flowers that you can start to cut.

Chloe’s Top Tips
Label, label, label! You think you will remember what you planted in which pot, but believe me, you won’t, especially if you’re sowing many different species. A permanent marker to write on the pot is just as good as a proper plant label, or wooden lolly sticks also make good labels. Charlie – “I cut yoghurt pots into strips and write on them in permanent marker, a great way to recycle those empty pots!”
Small seeds. Smaller seeds can still be sown in the freebie fruit and veg tubs, just fill with seed compost rather than Jiffys. Tiny seeds should be left uncovered with soil so the light can reach them. Some seeds such as Nicotiana’s and Antirrhinums are tiny.
Watering. Always water from the bottom. Fill up your sink and place the containers in the water so the Jiffys or compost can absorb the water, alternatively mist gently with a water sprayer.
Seed packets. Most seed packets will have instructions on them, including when to sow and possibly germination speed – so read the back of the packet before starting.
‘True leaves’. As a general rule of thumb I re-pot a seedling when it has developed a few true leaves. The first set of leaves are the ‘seed leaves’ – the ‘true leaves’ will look different and will identify if as the plant it is going to become.
Frost. It is not advisable to put potted on seedlings straight outside, the shock will be too much for them. Night frosts can still occur as late as June! Annuals will not tolerate any frost. A hardy annual or perennial can tolerate frost, but they will still need time to acclimatise after the warmth of your windowsill. A period of at least three weeks of hardening off is best.
Thank you!
I want to say a huge thank you to Chloe from BareBlooms for writing this feature for the New Wives Club, I know that a lot of you are keen to start small cutting gardens so hopefully this will help you (and me!) get started.
What are you planning or dreaming of growing? Have you already got some seeds growing or have you been inspired by this feature to order some? Please share you flower growing tips and tribulations below in the comments section.
{ Glossary }
Coir – coir fibre is made from the unused husks of coconuts and fully biodegradable
Jiffys – a dehydrated plug of compost that can be rehydrated and used as a medium to sow seeds, the whole Jiffy complete with seedling can be potted up
Harden/Hardening off – a period of adjusting a plant/seedling gradually to the cooler outside conditions when it has been sown/grown inside
Propagator – a bit like an indoor miniature greenhouse
Images: (1 10) BareBlooms
Categories: DIY + Inspiration
Tags: cut flowers > cutting garden > DIY project > grow your own > natural garden > new wives club


Brigitte on 6. May, 2012
What great ideas ! I’ve never heard of jiffys until now and can’t wait to try them. My poor garden is looking like a jungle after all of this rain. Time to don the wellies and get motivated into sorting it out!
Susanne on 7. May, 2012
Really good post. Especially the tip to always lable everything. So know the feeling: what the heck did I sow there?